Diagnosing Vacuum Leaks with Basic Tools
A vacuum leak in your engine is like trying to drink from a straw with a tiny hole in it – it messes up the suction. Your engine relies on a carefully controlled vacuum to run right. When extra, unmetered air gets in through a crack, a loose connection, or a worn-out gasket, it throws off the fuel-air mixture. This can make your engine act up, often in ways that are annoying at best, and damaging at worst.
What a Vacuum Leak Sounds and Feels Like
The first step to fixing a problem is knowing you have one. Vacuum leaks often announce themselves with a few common symptoms. If your car is showing any of these, a vacuum leak might be the culprit:
- Rough Idle: The engine might shake or feel like it’s going to stall when you’re stopped or in park. It’s like the engine can’t quite make up its mind on what RPM to hold. If you’re dealing with a rough idle but no check engine light, a vacuum leak is one of the first things to check.
- Hissing or Whistling Noise: This is the sound of air being sucked through a small opening. It’s usually more noticeable when the engine is running and you’re listening closely under the hood.
- Poor Acceleration or Stalling: Because the fuel-air mixture is off, the engine might not have its usual power, or it could even stall, especially when coming to a stop.
- Check Engine Light: A significant vacuum leak will almost certainly trigger your check engine light. It often sets “lean” codes, like P0171 or P0174, which mean the engine is getting too much air for the amount of fuel it’s injecting. You can learn more about why your check engine light comes on.
- Hard Starting: Sometimes, a large leak can make the engine difficult to start, especially when cold.
If you’re experiencing any of these issues, it’s worth investigating. You can find more information on common car symptoms in our guides.
Tools You’ll Need (Mostly Household Stuff)
You don’t need a fancy diagnostic computer to find most vacuum leaks. A few basic items from your garage or kitchen can do the trick:
- Safety Glasses: Always protect your eyes, especially when working around a running engine or spraying chemicals.
- Flashlight: Essential for peering into dark corners of the engine bay.
- Gloves: Protect your hands from grease and chemicals.
- Mechanic’s Stethoscope (Optional but Recommended): This helps pinpoint noises. If you don’t have one, a long piece of vacuum hose held to your ear can work in a pinch.
- Spray Bottle with Water and a bit of Dish Soap: For a simple, non-flammable test.
- Carburetor Cleaner, Brake Cleaner, or Unlit Propane Torch: Use with extreme caution. These are flammable and will be used to detect leaks. Never use starting fluid; it’s too volatile.
- Small Mirror: Useful for seeing hard-to-reach areas.
How to Track Down the Leak
Finding a vacuum leak is often a process of elimination. Take your time and be systematic.
1. The Visual Inspection
Start by looking. With the engine off and cool, grab your flashlight and visually inspect all the vacuum lines, hoses, and connections under the hood.
- Look for cracks: Especially at bends or where hoses connect to fittings. Rubber gets old, hard, and brittle.
- Check for loose connections: Make sure all hoses are firmly seated on their ports and clamps are tight.
- Inspect caps: Many unused vacuum ports on the intake manifold are capped. These caps can dry rot and crack.
- Examine the PCV valve and hose: These are common leak points.
- Look around the intake manifold gasket: This is a bigger job to replace, but a common leak source.
Wiggle hoses gently to see if any are loose or crumbling.
2. Listen for a Hiss
Start the engine and let it warm up. With the engine idling, listen carefully under the hood. Move your head around, listening for any distinct hissing, whistling, or sucking sounds. Use your mechanic’s stethoscope (or the vacuum hose trick) to isolate the sound. Place the probe (or end of the hose) near suspected areas like vacuum lines, the intake manifold, and throttle body. A clear hiss through the stethoscope means you’re close.
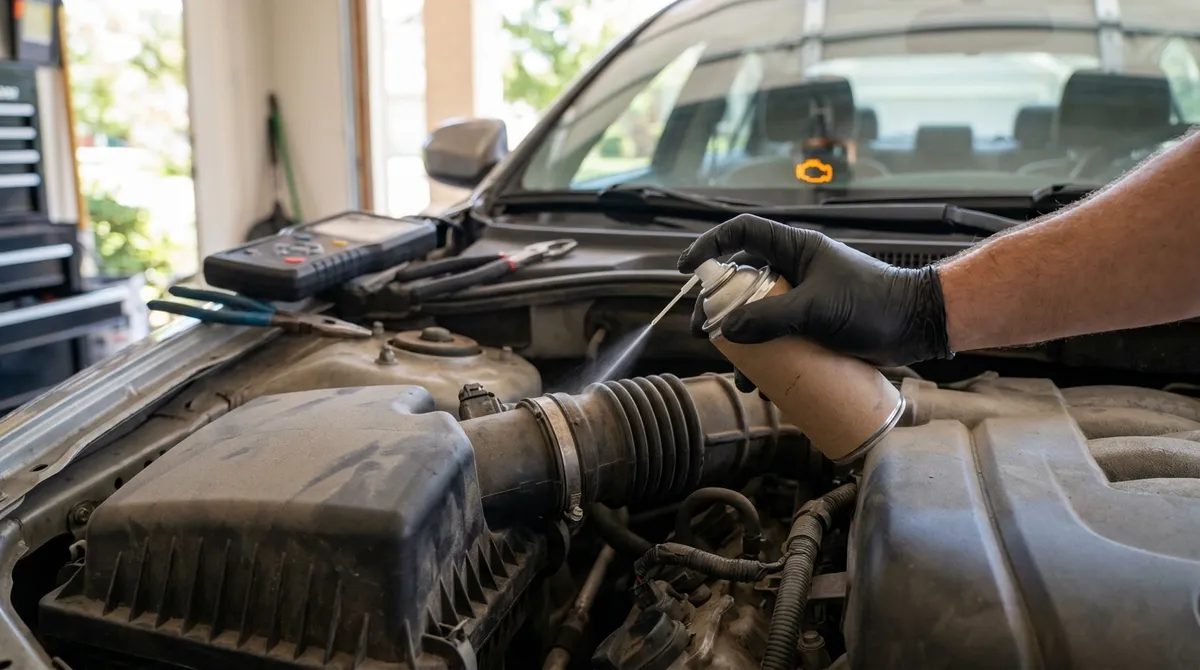
3. The Spray Test (Flammable Method)
This is the most common DIY method, but it requires caution because you’re introducing a flammable substance to a running engine. Ensure you have good ventilation, a fire extinguisher nearby, and are wearing safety glasses.
- Engine Running: Start the engine and let it idle.
- Spray Small Bursts: Take your can of carburetor cleaner (or brake cleaner, or propane from an unlit torch) and spray short bursts around suspected vacuum lines, the intake manifold gasket, vacuum caps, and any other potential leak points.
- Listen for RPM Change: If the engine RPM suddenly increases or smooths out for a moment, you’ve found your leak. The engine is sucking in the flammable spray, which temporarily enriches the fuel-air mixture.
- Propane Method: If using propane, hold the unlit torch nozzle near suspected areas. If the RPM changes, you’ve found the leak. Propane is often preferred as it leaves no residue.
- Be Patient and Thorough: Work your way around the entire engine bay, especially focusing on plastic and rubber components that degrade over time.
4. The Smoke Test (DIY Version)
Professional shops use dedicated smoke machines, but you can rig up a basic version if you’re comfortable. This involves introducing smoke into the intake system while the engine is off and looking for where it escapes.
- Block the Intake: You’ll need to block off the main air intake after the mass airflow sensor (MAF) to prevent smoke from just going out the air filter.
- Introduce Smoke: You can use a cigar, a vape pen, or even a small, controlled smoke generator (like those used for model trains) with a hose attached. Feed the smoke into a vacuum line or directly into the intake manifold (after blocking the main air intake).
- Look for Escaping Smoke: Watch for smoke to waft out of any cracks or loose connections. This method is very effective for small, hard-to-find leaks.
You Found It – Now What?
Once you’ve pinpointed the leak, the repair is usually straightforward:
- Replace the Hose: If it’s a cracked or brittle vacuum hose, cut a new piece to length or replace the entire hose. Make sure the inner diameter matches.
- Tighten the Clamp: If a hose was just loose, tighten the clamp.
- Replace the Cap: If a vacuum cap is cracked, replace it with a new one of the correct size.
- Replace the Gasket: If the leak is at the intake manifold gasket, this is a bigger job. It involves removing parts of the intake system to access and replace the gasket. This might be a job for a professional if you’re not comfortable with it.
After any repair, clear any stored trouble codes with an OBD-II scanner and drive the car to confirm the symptoms are gone and the check engine light stays off. You can often find diagrams and repair procedures for your specific vehicle in the MECH AI database.
When to Call in the Pros
While many vacuum leaks are DIY-friendly, some can be tricky. If you’ve tried these methods and still can’t find the leak, or if the repair involves complex disassembly you’re not comfortable with, it’s time to take it to a trusted mechanic. They have specialized smoke machines and diagnostic tools that can often find even the most elusive leaks quickly. For specific questions about your car’s symptoms, the MECH AI app can also provide tailored advice.